In laser engraving, we often focus on material type, laser power, and design – but one crucial factor is sometimes overlooked: material thickness. Understanding the Importance of Material Thickness in Laser Engraving is vital for achieving the best results. Whether you’re a seasoned professional, a DIY crafter, or an apparel decorator, the thickness of your engraving material can make or break your project’s quality and efficiency. The proper thickness affects everything from laser settings and engraving quality to the durability of the final product. This comprehensive guide will explore why thickness matters and how to choose the optimal thickness for various applications. (As an engraver, remember that LaserHyde, an Engravable Leatherette Supply Company, specializes in premium materials and tools designed with these principles.)
Why Material Thickness Matters in Laser Engraving
Material thickness is more than just a physical dimension – it fundamentally influences how a laser interacts with a material. A laser engraver’s performance can vary greatly depending on the thickness of the workpiece. For instance, thicker materials require the laser beam to penetrate deeper, which may necessitate higher power or slower speeds. If a material is too dense for a given laser’s capabilities, you might struggle to achieve a clean cut or consistent engrave. (Most hobby-grade CO₂ laser cutters have limits – they can typically cut up to about 1/2″ thick material, but for very dense substrates it’s suggested to stay under 1/8″) Even when not cutting through, engraving a thick piece often means adjusting focus and power to reach the desired depth. In contrast, fragile materials can be cut or marked quickly, but they introduce other challenges like stability and risk of damage. In short, material thickness matters because it directly impacts how you set up your laser and the quality of outcome you can achieve.
Laser Settings and Their Role in the Importance of Material Thickness in Laser Engraving
Getting the laser settings right for a given thickness is crucial. The general rule is that thicker materials demand more laser energy: you might lower the engraving speed or increase the power to mark or cut a thicker piece adequately. For example, engraving on a 2 mm thick leatherette sheet might require a slower, more powerful pass than engraving on a 0.5 mm thin wood veneer. It’s all about ensuring the laser’s energy can vaporize or etch the material to the desired depth without causing burns or incomplete cuts. Many laser operators perform test runs on scraps to fine-tune settings for each thickness – a practice highly recommended by experts.
Additionally, laser focus must be considered. Lasers have a fixed focal length where the beam is most concentrated; if the material’s surface is not at that focus point (for instance, if the material is warping or if you’re engraving on a curved/thick object without adjustment), the engraving can become blurry or uneven. Ensuring the material lies flat and at the correct height is paramount (the best results come from flat, non-warped materials that maintain consistent focus). Some advanced techniques even involve adjusting focus for multiple passes on very thick materials – for example, slightly raising or lowering the laser head between passes so you can engrave deeper into a thick piece with sharp results. The bottom line: constantly adjust your laser settings (power, speed, and focus) to suit the material thickness for optimal engraving performance.
Thin vs. Thick Material Behavior
Different thicknesses of material will behave differently under a laser. Thin materials (like thin leatherette, paper, fabric, or veneer) tend to heat up quickly and can be prone to warping or curling from the laser’s heat. They are also lightweight – a laser machine’s air assist or exhaust might even shift a thin sheet if it’s not secured, leading to misalignment. When engraving or cutting fragile stock, it’s best to use masking tape or a honeycomb bed with hold-down pins to keep it flat. You may also need to dial down the laser power to avoid burning through. For instance, a delicate 0.5 mm wood veneer might scorch or disintegrate if you use the same settings meant for a 5 mm plywood board. Thicker materials are sturdier and less likely to move or warp from brief laser exposure. A 5 mm acrylic or A 2 mm leatherette sheet will stay flat on the bed and absorb more heat, allowing for deeper engraving. However, thickness brings challenges: a very thick piece might have a limited focus range – only the surface is at the optimal focal point. If you tried to engrave extremely deep, the lower layers would be out of focus. (This is why multiple passes or special lenses are used to maintain focus when cutting thick materials, such as when you cut deeper.) Additionally, extremely thick or bulky items might not fit in some laser machines without removing the bed or using risers. Consider the material behavior: thin materials require gentle handling and secure fixturing, whereas thick materials require correct focus and possibly more passes to get clean results.
Standard Material Thickness Ranges for Laser Engraving
Laser engravers work with various materials – each available in different thicknesses. Here are some standard thickness ranges and considerations for popular engraving materials:
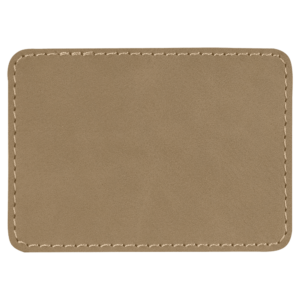
- Laserable Leatherette: Often found in sheets around 1.2 mm (3/64″) thick for standard grades. This thickness engraves beautifully – for example, a gray/black leatherette sheet at ~1.2 mm will engrave to reveal a contrasting black core. Premium suppliers like LaserHyde have recently introduced thicker leatherette sheets (~2.0 mm thick) to offer a more substantial feel and better durability. (We’ll discuss the benefits of thicker leatherette shortly.)
- Genuine Leather: Leather is often measured in ounces, where 1 oz ≈ 1/64″ (~0.4 mm). Standard thickness for laser engraving projects ranges from ~3–4 oz (approx 1.2–1.6 mm, suitable for patches and small items) up to 6–8 oz (≈ 2.4–3.2 mm, used for robust coasters, wallets, belts). Skinny leather (<1 mm) can be engraved but may not cut well and could have frayed edges due to its fibrous nature. Thicker leather (2+ mm) engraves and cuts with cleaner edges because it’s more robust – in fact, experts suggest using thicker, high-quality leather for better results, as it has a denser fiber structure that cuts and engraves more cleanly.
- Wood and Plywood: Laser-friendly plywood (like birch or basswood ply) commonly comes in 1/8″ (3 mm) and 1/4″ (6 mm) thicknesses for craft and engineering projects. Solid woods can be engraved at virtually any thickness (you might engrave a design into the surface of a 2″ thick wood plaque), but cutting is typically limited by machine power. Thin wood veneers (~0.5 mm) are great for inlays but require very low power to avoid charring. By contrast, a 1/4″ plywood will need slow, high-power cuts or multiple passes to cut through. Many hobby lasers struggle beyond 1/4″ thickness when cutting; even if the laser bed can accommodate 1/2″ wood, the cutting quality may decline, and multiple passes are needed.
- Acrylic and Plastics: Cast acrylic sheets are commonly used in 1/8″ (3 mm) and 1/4″ (6 mm) thickness. They engrave well at those sizes – 3 mm acrylic is thin enough for keychains or signage, while 6 mm gives a sturdier result. Thinner acrylic (1.5 mm or less) can warp from heat and is tricky to cut without melting edges. Thicker acrylic (e.g., 3/8″ or 1/2″) can be surface-engraved for a beautiful 3D depth effect, but cutting through such thick acrylic requires a potent laser or multiple passes. As a guideline, many desktop CO₂ lasers recommend staying around 1/4″ or less for acrylic cuts to maintain edge quality.
- Metals: Most laser engraving on metals is marking (with a fiber laser or spray on CO₂) rather than cutting, so the thickness is less of a limitation for engraving itself – you can mark the surface of a thin aluminum tag or a thick steel tool. However, thicker pieces can handle deeper marks for deep engraving into metal (etching significantly into the surface). For example, a thick brass plaque can be deeply engraved for a lasting result, whereas a thin metal plate might warp or show through on the backside if engraved too deeply. Typically, metal blanks for engraving (like trophy plates or anodized aluminum sheets) are thin (~0.5 mm) but only require surface etching. In contrast, coins or firearm parts are thicker and allow deeper engraving.
Key takeaway: every material has standard thickness ranges that work best for laser projects. Knowing these ranges helps you select the right stock for your needs and adjust your settings appropriately.
How Thickness Affects Engraving Quality, Detail, and Durability
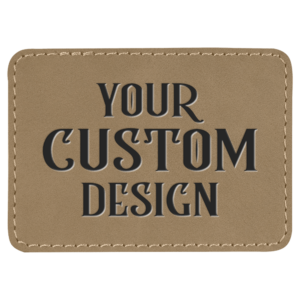
Engraving Quality & Clarity: Material thickness can indirectly influence the quality of your laser engraving. While the machine and lens determine the laser’s resolution, a properly chosen thickness can enhance the clarity of the engraving. For example, using a material that is too thin might lead to over-penetration – a laser set to engrave text on a 0.5 mm thin sheet might accidentally cut through in spots or cause burn marks on the backside, resulting in a messy look. You can dial in settings to etch just the surface on an adequately thick material, yielding crisp lines and consistent depth. Thicker materials also allow for higher contrast engravings in many cases. With laserable leatherette, a thicker sheet has more of the top layer to vaporize, often producing a darker, well-defined mark as the laser exposes the underlayer cleanly. If a material has multiple layers or coatings (like painted brass or anodized aluminum), the thickness of that top layer will determine how sharp the contrast is when engraved. In short, to get the best quality engraving, choose a thickness that can handle the depth and detail you want without deformation. A good practice is to perform test engraves at various power settings on a scrap piece of the same thickness to ensure the engraving will be sharp and visible.
Fine Detail and Design Precision: Material thickness plays a supportive role when it comes to intricate designs. If you’re engraving fine details (say, small text or a detailed logo), a stable material of moderate thickness is ideal. Fragile materials might not hold tiny details well – thin wood or leather could singe away delicate features or curl, throwing off alignment for detailed patterns. By contrast, a thicker piece provides a solid canvas where fine details can be cleanly etched without the material flexing or buckling. Additionally, if your design includes multiple engraving depths (3D layered engraving), you’ll need a sufficiently thick material to accommodate those layers. For instance, engraving a relief or a photo with varying depths on wood requires thickness so the deepest areas don’t punch through the piece. A material that’s too thin would limit you to shallow engraving only.
On the other hand, extremely thick materials may have a tapered engraving effect on the edges of details. As the laser beam penetrates, it slightly widens (due to focus and beam divergence), so very thick pieces might not reproduce excellent gaps as sharply as thinner ones. In practice, for most fine-detail engraving (like nameplates, intricate leather patches, or acrylic awards), a medium thickness (not paper-thin, not overly thick) yields the best precision.
Durability and Longevity: One clear advantage of the right material thickness is the improved durability of the engraved item. Generally, thicker materials and deeper engravings last longer. A deep engraving on a sturdy 2 mm thick leatherette patch will withstand abrasion and wear better than a superficial mark on a flimsy 0.5 mm piece. Deeper engravings tend to last longer than shallow ones, creating a more permanent mark resistant to wear and tear. This is especially important for items subject to frequent handling or friction – think of a laser-engraved leather keychain or a metal tool with engraved markings. If the base material is thick and robust, and the engraving is sufficiently deep, the design won’t easily fade or get scratched away. Thickness also contributes to structural durability: a thicker tag or patch is less likely to tear, curl, or deform during use. For example, leather patches on hats are often preferred in a thicker variant (around 2 mm) because they hold up to sewing or adhesive application and daily wear without losing shape. Similarly, engraved signage on a thick acrylic or wood base will feel more substantial and resist cracking. It’s worth noting that material quality and thickness go hand-in-hand – a high-quality, thick material will engrave with sharp edges and remain durable. (As a case in point, leather experts suggest using thicker, high-quality leather for engraving due to its denser fiber content, resulting in a sturdier, cleaner outcome.) In summary, if longevity and durability of the engraved piece are priorities, opting for a thicker material (and engraving deeply into it) is a wise choice.
Production Efficiency: Material thickness can also affect your production speed and efficiency. Thinner materials often engrave and cut faster – the laser doesn’t need to work as hard to ablate a small material. If you’re producing hundreds of lightweight tags or thin labels, you’ll likely move through them quickly with short engraving cycles. You might even be able to stack some ultra-thin materials (like two sheets of cardstock) to engrave/cut two at once, although this isn’t common for precision work. In contrast, thicker materials generally take more time per piece. Engraving deeply into a thick piece of wood or doing multiple passes on a 1/4″ acrylic to cut it will slow your workflow. You may need to reduce speed to get the desired depth or do multiple passes, directly impacting throughput. There’s also machine strain to consider: repeatedly cutting at full power through thick stock can heat the laser tube or optics more than the light engraving on thin stock. However, efficiency isn’t only about speed – it’s also about yield and handling. Sometimes, using a thicker, larger sheet and cutting out many parts can be efficient (e.g., engraving a whole batch of coasters from a single 12 “x24” sheet of 3 mm wood). Other times, working with material that’s too thick for your laser can waste time and material (failed cuts, charred edges requiring sanding, etc.). The key is to choose the minimum thickness that achieves your project goals. For example, if a 1.5 mm leatherette will serve your patch project, there’s no need to use 3 mm and double your laser time – unless that extra thickness adds value in look or durability. Finding the right balance will ensure production efficiency while delivering quality results. Always consider how thickness impacts the engraving outcome and the speed and cost of producing each item.
LaserHyde Products and Tools for Optimal Material Thickness
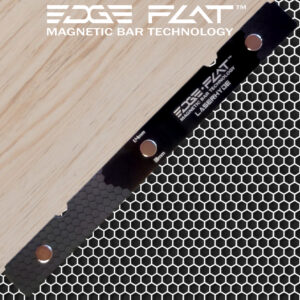
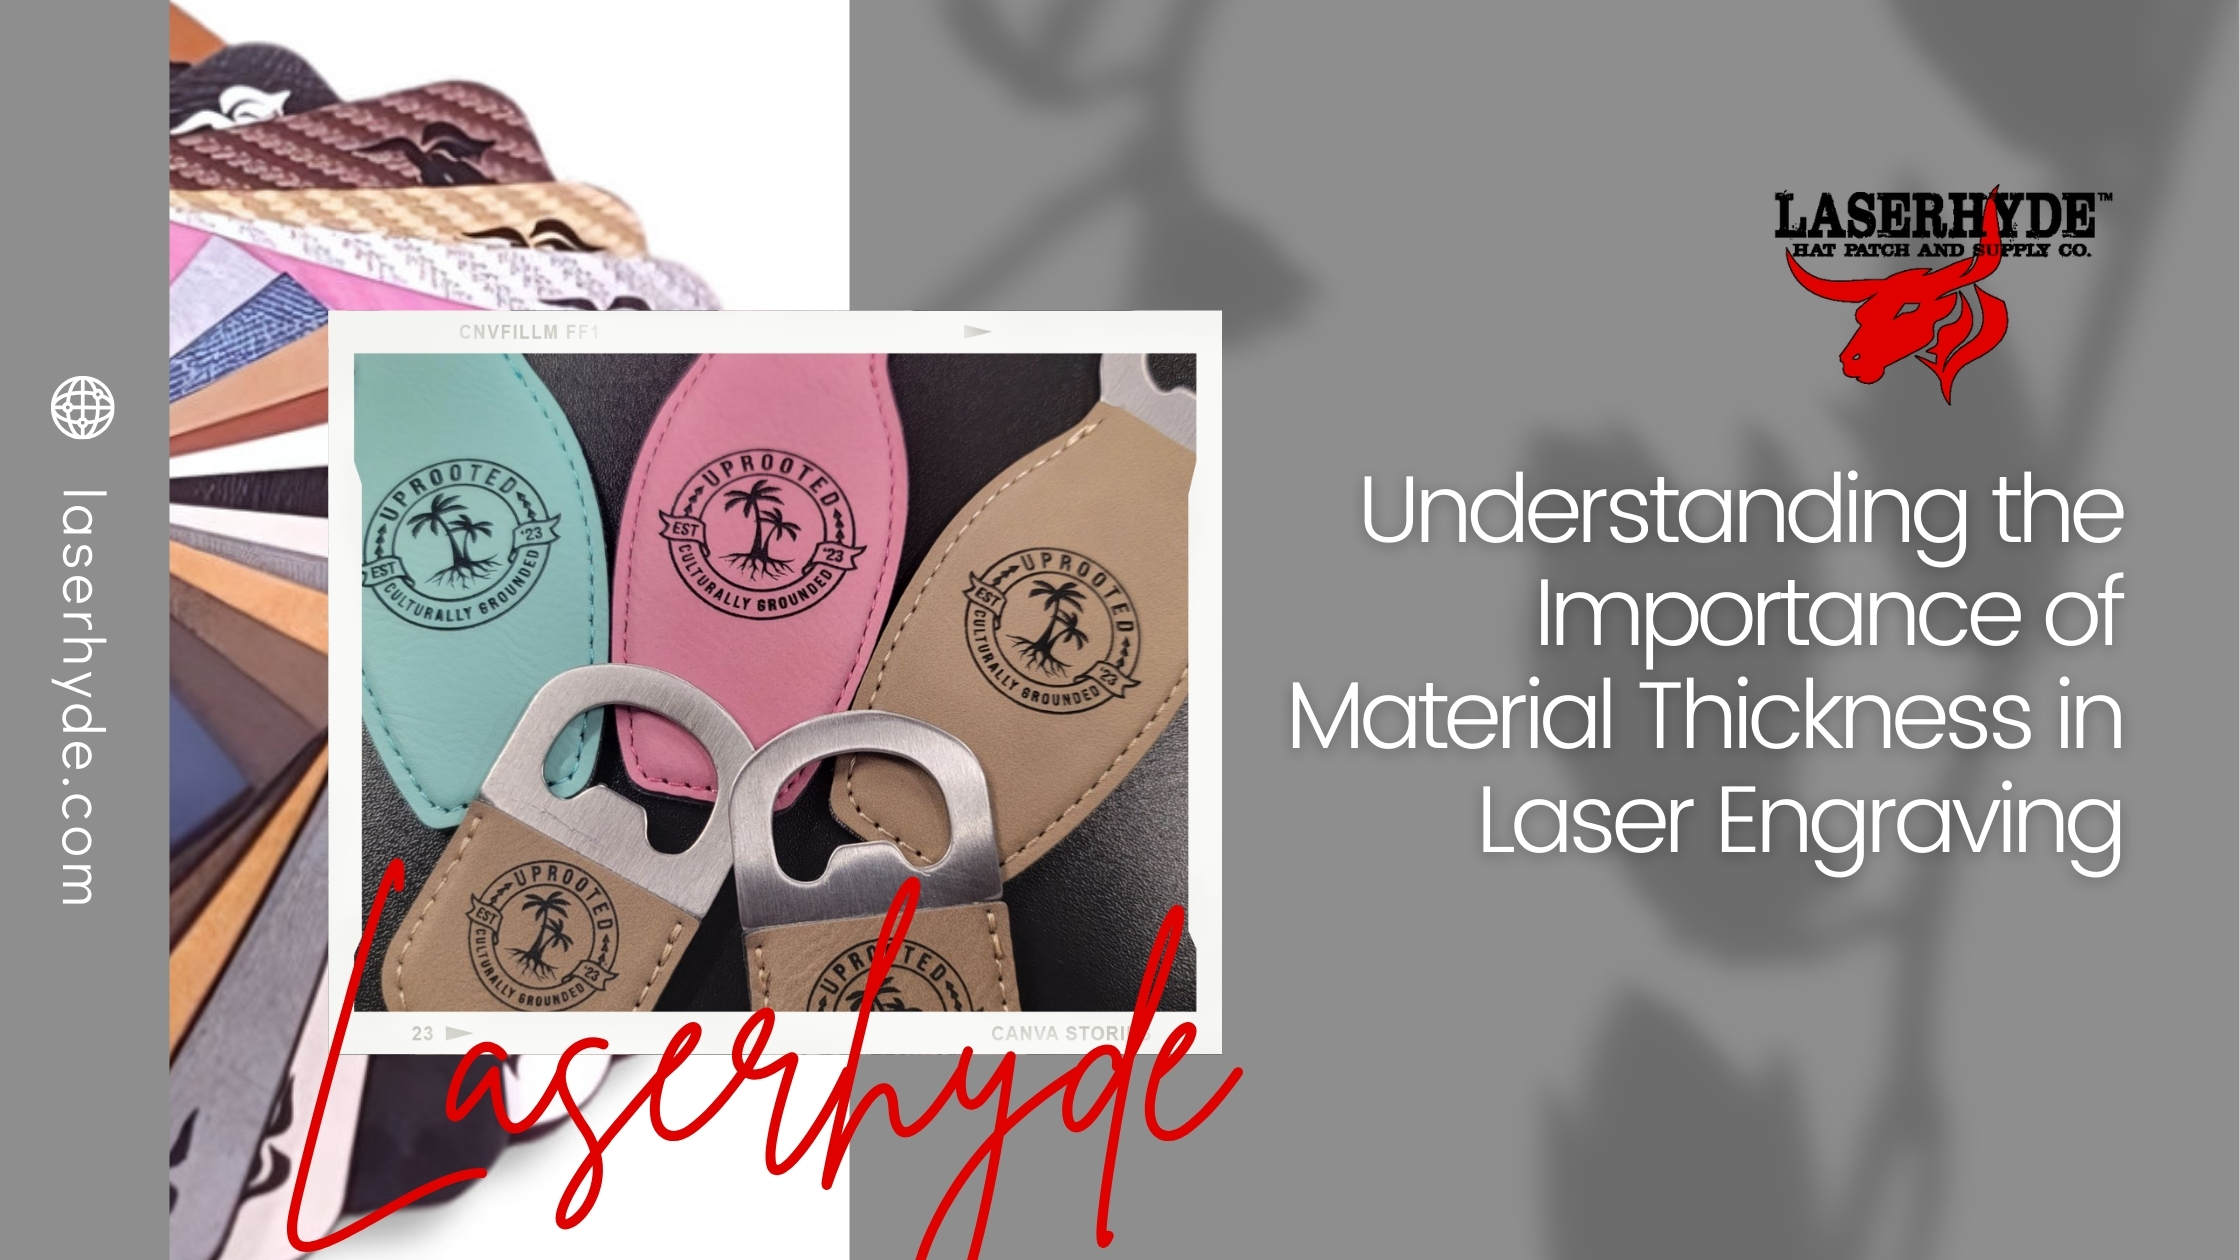
To meet the needs of laser engraving professionals and hobbyists, LaserHyde offers materials and tools optimized for various thickness requirements. The LaserHyde Deluxe™ Leatherette Sheets is a flagship product, notably thicker than standard laserable leatherette. These sheets are approximately 2 mm thick, providing a sturdier canvas for engraving and cutting. Why the emphasis on thickness? Because LaserHyde recognized that many off-the-shelf leatherette sheets were thin and could be challenging to work with or less durable for finished products. The Deluxe Leatherette Sheets set a new standard by offering a super thick, professional-grade leatherette that yields crisp, high-contrast engravings while maintaining structural integrity. In a social media update, LaserHyde even highlighted this, saying their leatherette is a full 2mm thick – a premium material without the premium price.
Beyond just raw material, LaserHyde provides tailored options to suit different thickness needs. For example, the Latigo Signature Collection leatherette is offered in two forms: a foam-backed version (ideal for hat patches requiring extra rigidity and loft) and a No-Foam Flex version that forgoes the foam to remain bendable for apparel applications. The foam backing effectively increases the overall thickness of a patch for a more pronounced look on caps. At the same time, the no-foam variant keeps the material lean and flexible for sewing onto clothing or wrapping around curved surfaces. Both types leverage the same thick leatherette base, meaning you don’t sacrifice engraving quality when choosing one or the other – you get to pick whether you need that added foam thickness.
LaserHyde also backs up its materials with precision tools and accessories related to material handling. One such offering is the line of ESENTL™ Hat Patch Tools (like the Hat Mat™ silicone kit and Patch Ruler™ Guide). These tools are designed to help you place and secure patches (often thick leatherette patches) on hats and other items with perfect alignment and even pressure. For instance, when heat pressing a thick leatherette patch onto a hat, the Hat Mat silicone pad ensures even heat distribution and protects the hat’s shape while the adhesive on the patch activates. Using alignment guides helps with multiple patch thicknesses – you can easily position a thick patch consistently on each product, ensuring a professional look every time.
Speaking of adhesives, LaserHyde provides low-temperature thermal-activated film adhesives (sold by the yard or in pre-cut sheets) that pair with their leatherette. These adhesives are engineered to bond even thick patches to fabrics or hard goods strongly. A common challenge when working with heavy, thick patches is making sure they stay put on the final product. LaserHyde’s solution was to develop a heat-press adhesive that activates at lower temperatures (so it won’t scorch the engraved patch or the hat) but creates a durable bond. The thicker the patch, the more critical a reliable adhesive is – and LaserHyde’s HydBond™ adhesive film is formulated to easily handle those deluxe 2mm patches (as well as thinner ones). The result is patches that look great and stay on firmly, whether on a hat braving the outdoors or a jacket that sees daily wear.
In summary, LaserHyde’s products acknowledge the importance of material thickness by providing materials at optimal thicknesses for engraving (like the Deluxe Leatherette Sheets) and the tools to work with them effectively. Engravers can achieve precision and consistency using high-quality, thick material and proper accessories. It’s this holistic approach – offering both the materials and the know-how/tools – that empowers users to tackle projects with confidence in the outcome. (Our experience as an engravable leatherette supply company has shown that when customers use the right thickness material and the proper tools, their success rate and satisfaction skyrocket.)
Best Practices for Selecting the Right Thickness for Different Applications
Choosing the right material thickness depends mainly on what you’re making. Here are some best-practice guidelines for various laser engraving applications, from patches to gifts:
- Hat Patches and Emblems: A medium-to-thick material is preferred for patches that go on hats (like leatherette patches on baseball caps or beanies). Approx. 2 mm thick leatherette is an ideal choice for hat patches – it’s thick enough to be durable and showcase a nice depth when engraved, yet still manageable to adhere. LaserHyde’s Deluxe Leatherette (around 2 mm) with optional foam backing is a prime example: the foam adds a bit of extra thickness and stiffness, helping the patch hold a curved shape on a hat without lifting at the edges. Thinner patches (under 1 mm) on hats might curl or not look as premium, whereas a sturdy patch looks and feels high-quality. Always consider how the patch will be attached: if using a heat press adhesive, ensure the combined thickness isn’t so high that the heat can’t reach through (LaserHyde’s low-temp adhesives work well even with thick patches). Very thick patches may be harder to stitch if sewing, so something around 1.5 mm might be the upper comfort limit for most sewing machines.
- Labels and Internal Tags: Engraved labels for apparel (such as a faux leather label inside a shirt or a small tag on a purse) should be on the thinner side. Typically, 0.5 mm to 1.2 mm material works best here. You want the label to be flexible and not cause discomfort or bulging. A thin, engravable leatherette (around 1 mm) can still engrave a crisp logo or text but will lie flush when sewn or glued into a garment. LaserHyde’s No-Foam Flex leatherette is suited for this purpose – it offers the look of their thicker material but in a format that’s easier to bend and stitch. When selecting thickness for labels, also consider the application method. If it’s being sewn onto fabric, too much thickness makes it challenging to stitch cleanly and could be irritating to the skin. If it’s adhesive-backed, thinner material will adhere without a powerful glue (thick pieces might peel if the adhesive isn’t strong enough along the edges). In short, go thinner for labels so they are functional and comfortable but still thick enough to handle the engraving detail (around 1 mm is a sweet spot).
- Apparel Decorations and Patches on Clothing: For decorative patches on jackets, backpacks, or other apparel (that might be larger than a hat patch), consider medium thickness – roughly 1.5 mm to 2 mm. These patches often serve as style elements and must be durable for outdoor use. A medium-thickness patch can be riveted or sewn onto heavy fabric. LaserHyde even offers Custom Rivet Tags for Apparel using their Deluxe leatherette; those are designed to be thick and robust enough to take a rivet or grommet without tearing. If your patch or emblem goes on a flexible surface (like a sleeve or pant leg), you might err slightly thinner (around 1.5 mm), so it conforms better. For stationary surfaces (like a backpack panel or a jeans label on the waistband), 2 mm works great and gives that high-end feel. Always match the thickness to the method of attachment and the required flexibility of the finished piece.
- Personalized Gifts and Accessories: This category includes coasters, keychains, luggage tags, wallets, plaques, and more. Here, thickness often equates to perceived quality. Thicker materials (2–3 mm) are generally preferred for gifts that should feel substantial – for example, a laser-engraved leatherette coaster at 2.5 mm thick will feel much more premium and last longer than one made from a 1 mm thin cutout. Similarly, a 3 mm acrylic or 2 mm leather keychain will withstand daily wear (jostling with keys) far better than something paper-thin. However, consider the function: a wallet insert or a bookmark would need to be thinner (so it can slide into place), whereas a free-standing engraved sign can be as thick as you want. For two-layer gift items (like an inlay or a sandwich of materials), you can use a thinner top layer for detail and a thicker base for strength. For instance, some people engrave a thin layer of wood or leatherette and then mount it on a thicker wood backer – in such cases, the thin layer might be ~1 mm for fine detail, and the backing 3–4 mm for rigidity. Assess the use-case: if it’s decorative and often handled, lean towards sturdy thickness; if it’s functional and needs to fit somewhere, use just enough thickness to be durable but not impede the function (e.g., an engraved luggage tag around 2 mm is tough yet not too bulky).
- Stacked or Layered Projects: In creative projects where you layer multiple laser-cut pieces to build depth (like multi-layered wall art or puzzle kits), plan the thickness of each layer strategically. Often, these use thin materials (1–2 mm each) so that the total isn’t overly thick when layered. The laser engraving on each layer can be shallow since you might paint or contrast-fill the cutouts. While this is a more niche application, it’s worth noting that if you try to use very thick layers for a multi-layer assembly, alignment can get tricky, and the pieces may not glue together cleanly. It’s usually better to stack multiple thin engraved pieces than one too-thick piece that the laser struggles with.
By following these best practices and considering the specific needs of each application, you can select the optimal thickness that balances engraving quality, durability, and ease of production. Remember that these are guidelines – there will be exceptions depending on your laser’s exact material composition and capabilities. When in doubt, test a small piece or consult with material suppliers (like LaserHyde), who can often recommend the best thickness for your project based on their expertise.
Conclusion
In the laser engraving field, understanding the Importance of Material Thickness in Laser Engraving is as crucial as mastering your machine settings. The thickness of your material underpins the entire engraving process – influencing how you prepare your artwork, adjust your laser, and even finish and use the final product. By choosing the right thickness for the job, you ensure that your engravings come out sharp, your cuts are clean, and your creations are durable and professional-grade. We’ve seen how thicker materials can improve durability and allow for deeper, longer-lasting engravings, while thinner materials can enable finer detail or faster production when used appropriately.
As you plan your next laser engraving project – a set of custom hat patches, a batch of leatherette labels, or a series of engraved gift items – take a moment to evaluate the material thickness. Consider the guidelines and best practices this article outlines to select a thickness that will give you the best engraving quality, adequate strength, and efficient production time. In laser engraving, precision is everything, and that precision starts from the ground up – quite literally with the material you place on your laser bed. Embrace the importance of thickness, and you’ll see the difference between your finished pieces and your workflow. Happy engraving, and remember that whether you need advice on materials or top-tier laserable products, the team at LaserHyde (your trusted Engravable Leatherette Supply Company) is here to help you achieve engraving excellence.